Driveway heating systems are hydronic systems intended to augment the removal of snow and ice by circulating a heat transfer fluid (usually a glycol and water mixture) through PEX pipes installed within the area.
Driveway heating systems are used across North America for residential, commercial, institutional, industrial and public applications
Slab-on-Grade
This method is for designs with light to moderate vertical load requirements across the slab. With under slab and edge insulation, the heated slab is isolated from high movement of energy from the slab to the surrounding frozen soil. Response time is fairly quick and ideal for residential application.
When to use: This installation is applicable for driveways and sidewalks.
How to install: The base layer must be properly compacted prior to installing the insulation and tubing. The tubing is then laid down on a high-density insulation board. Modern products have securing pucks molded on the insulation board so securing pipe to mesh is no longer required. Install vertical insulation along the entire edge down to the depth of the horizontal under-slab insulation. The insulation creates a thermal break between the heated slab and the frozen ground. The concrete slab is then poured on top of the tubing about 2-3″ thick or as per design. This system is pre-pressurized during this process.
Control Strategy: We recommend using a semi- or fully automatic strategy with this installation method. Full automatic is preferred.
Pavers Over a Compactable Soil/Sand Bed
This method is for designs with light vertical load requirements. With insulation, the heated area is isolated from high movement of energy from the snow and melting system to the surrounding frozen soil. Response time is fairly quick and ideal for residential applications.
When to use: This installation is applicable for driveways and sidewalks.
How to install: The tubing is installed on high-density insulation. Modern insulation products have securing pucks molded on the insulation board. Securing pipe to mesh is no longer required. Install vertical insulation along the entire edge down to the depth of the horizontal insulation. The insulation creates a thermal break between the heated area and the frozen ground. After installing the tubing, cover with a compactable soil/sand bed (typically 2 to 3 inches) prior to applying pavers or bricks.
Control Strategy: We recommend using a semi- or fully automatic strategy with this installation method. Full automatic is preferred.
Asphalt Pour Over a Compactable Soil/Sand Bed
This method is for designs with light vertical load requirements. With insulation, the heated area is isolated from high movement of energy from the snow and melting system to the surrounding frozen soil. Response time is fairly quick and ideal for residential applications.
When to use: This installation is applicable for driveways and sidewalks.
How to install The tubing is installed on high-density insulation. Modern insulation products have securing pucks molded on the insulation board so securing pipe to mesh is no longer required. Install vertical insulation along the entire edge down to the depth of the horizontal insulation. The insulation creates a thermal break between the heated area and the frozen ground. After installing the tubing, cover with a compactable soil/sand bed (typically 3 inches) prior to applying the asphalt pour. Cold water is flushed through pipes during placement of asphalt to keep the pipes cool. Under 200°F (93°C)
Control Strategy: We recommend using a semi- or fully automatic strategy with this installation method. Full automatic is preferred.
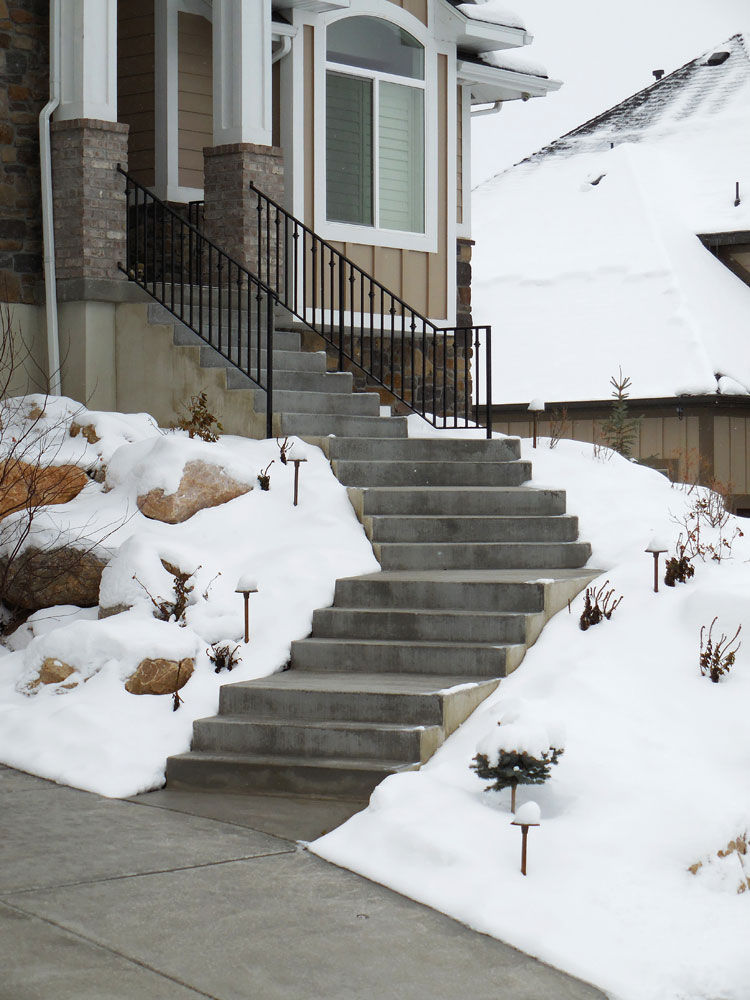
Stairs Installation
Stairs can be very hazardous during the winter. They are also the most expensive and time consuming area for manual snow and ice removal.
Stairs Installation The most critical portion of the step is the leading edge formed by the tread and the step riser. This area has the greatest exposure to air temperature and wind effect with the least heated mass to counter these effects. As shown above, install the tubing parallel to the edge of the step tread. Run supply on the leading edge of the treads. Secure the tubing to the reinforcing bar within the stair structure. Tubing bend supports can assist the install in making the required tight turns.
Control Strategy Unless specific circumstances warrant the stairs to be on a separate zone or it’s a single SIM area, we recommend the same control strategy as the main SIM area.
Snow and Ice Melting Performance
Snow and ice melting systems must be designed to perform to the customer’s needs and expectations. There are many ways to design a snow and ice melting system. They vary in the spacing of tubing, the BTU/h required, how the area is insulated, the depth of the concrete and the controls selected to run the system.
Snow and ice melting systems are typically designed to melt snow at 0°F with a 10-mph wind. Local conditions may require higher or lower design temperatures.
There is a point at which a design may become financially difficult to justify for operation in Class 1 and some Class 2 applications. In those situations, we can program the controls with a cold weather cut-off (CWCO) temperature. This allows the owner to automatically turn the system off at a desired temperature. The system automatically restarts as soon as the outdoor temperature rises above the CWCO temperature.
Snow and ice melting designs fall into one of three classification levels (1, 2, 3). The higher the classification, the higher the BTU/h/ft2 load. The on-center recommendations shown with each class are subject to a reduction in on-center distance as the climatic conditions become more severe or the end-user’s requirements become more stringent.
Always use an under-slab rated product, as standard fiberglass insulations will not meet the insulating value once it is compressed. Be sure that the insulation selected meets local code and building requirements.
We recommend a minimum thickness of 2-inch high-density board for perimeter and horizontal insulation. Typically, this gives an R-value of 10.0 (check manufacturer information), and provides a durable surface to walk on while installing the tubing. There are new options for insulation entering the market each year. Ensure that these products meet the vertical load and compression requirements for under slab installations. Refer to the project engineer for guidance.
Remember that the heat loads (BTU/h/ft2 ) in snow melting systems are much greater than typical home heating systems. Using a higher R-value insulation reduces the energy lost to areas around and below the snow-melt area.
It is important to consider the placement of hydronic manifolds. Many SIM system installations will require hydronic manifolds exterior of the home. It’s best to pre-plan for this placement as holes need to be pre-dug with water proof poured concrete shells, or large plastic irrigation box's will need to be installed to protect the manifolds and allow for future access.
Control Strategies
Constant Idle: Use this type of control strategy in commercial applications such as the heated aprons before and after a car wash entrance. The slab is maintained above freezing at all times to eliminate the build-up of ice from water dripping off the cars.
Semi Automatic: Systems can be designed to be semi-automatic. What differentiates this strategy from a constant idle system is that the start of the melting cycle happens with user interaction, or by pressing the on/off switch. The run cycle ends via a “time-out” feature where the user sets the specific time interval. The setup or programming is more extensive than the constant idle scenario, but it provides additional benefits and safety features for the user. The system automatically shuts off as programmed, which eliminates any wasted fuel consumption.
This type of control uses a slab sensor that provides temperature data feedback. Set the control to a temperature to melt snow. Once the desired slab temperature is achieved and the time interval has ended, the control automatically ends the heat demand. This keeps the slab from overheating, so it operates more economically. For example, set the control at a 38°F slab temperature and a four-hour run cycle. To start the melting process, press the button on the control. Once the system reaches 38°F on the sensor, the timer begins. The heat plant continues to cycle and add heat, keeping the slab at 38°F. The snow-melting operation automatically ends after four hours.
Automatic: A fully automated system requires user input to program the control. Once powered up, the control takes over from there. Automatic controls eliminate human intervention to start and stop the snow melting system. These systems incorporate a disk or sensor at the surface level of the snow-melting area. These types of sensors offer increased capabilities over conventional slab sensors. For example, they provide outdoor temperature feedback, current slab temperature, and detect the presence of moisture (snow or ice at temperatures below 32°F). Most advanced automated controls provide snow and ice detection, which is the ability to idle the system (considered as a slab low limit) and react to outdoor ambient conditions. The ability to sense outdoor temperatures offers the option of locking out a heat demand when it is too warm or too cold. These features optimize fuel consumption. Conditions may exist where it is either too cold for snow to fall or too warm for snow to accumulate due to solar exposure.
There is a difference between idle setpoint temperature for the slab and the snow-melt setpoint temperature. To idle a slab under the automatic control strategy, maintain the slab at a setpoint temperature until activated by the control to accelerate into the snow-melt mode. The control then targets the snow-melt setpoint temperature as its new slab temperature. Supply fluid temperatures are adjusted by the mixing control to support this new, higher setpoint temperature.
Often the idling setpoint temperature is just under freezing (28 to 30°F). This allows the system to respond quicker to a call for snow melt than if the slab was allowed to cool down to ambient temperatures. At other times, the specification may require that the slab should not freeze. In this situation, the idle setpoint temperature is maintained above freezing (34 to 36°F). This setpoint is often used in Class 3 snow-melt applications or when the surface condition of the slab is critical, such as an emergency helipad.
Copyright 2025 Imperial Energy | All Rights Reserved
Powered by Imperial Energy